Centos Upload Files to Aws S3 Bucket
SFTP is a secure shell protocol used to transfer files and directories between Linux and Windows servers. It is used by developers, website owners, fiscal services, and healthcare to exchange information between business concern clients. SFTP uses an SSH protocol for the secure transfer of files over the cyberspace.
AWS Transfer Family unit is a fully managed AWS service that enables you to transfer files to and from Amazon S3 buckets. AWS Transfer Family uses SSH, SFTP, FTPS, and FTP protocol to transfer files over the internet.
Files.com is an extremely fast, reliable, and enterprise-set up file server solution that allows users to upload and share files. Files are encrypted and designed to work with all protocols. It can exist integrated with different cloud providers including, Amazon S3, Dropbox, Google Drive, Microsoft Azure, SFTP, Microsoft 1 Drive, Sharepoint, Box, and many more to mount and sync files and directories.
Central Features for Files.com
- Compatible with almost all devices and is simple to utilize.
- Avails secure syncing and mounting will create any cloud or server for ease of storage of the data.
- Tin can connect with whatever app.
- Offers fast upload and download with a secure link.
- Especially for huge files (upward to 5TB), Files.com proves to be highly ingenious.
In this post, you will learn the following:
- Create an Amazon S3 bucket.
- Create an IAM Function for SFTP Users.
- Create SFTP Server on Amazon AWS.
- Admission SFTP server from Linux.
- Integrate Files.com with Amazon SFTP Server and mountain S3 bucket to Files.com.
Create an Amazon S3 bucket
In this section, we will create a bucket on Amazon S3.
Follow the below steps to create a bucket:
1. log in to the AWS panel at https://console.aws.amazon.com/
2. Search for S3 in the search bar. Yous should run across the following screen:
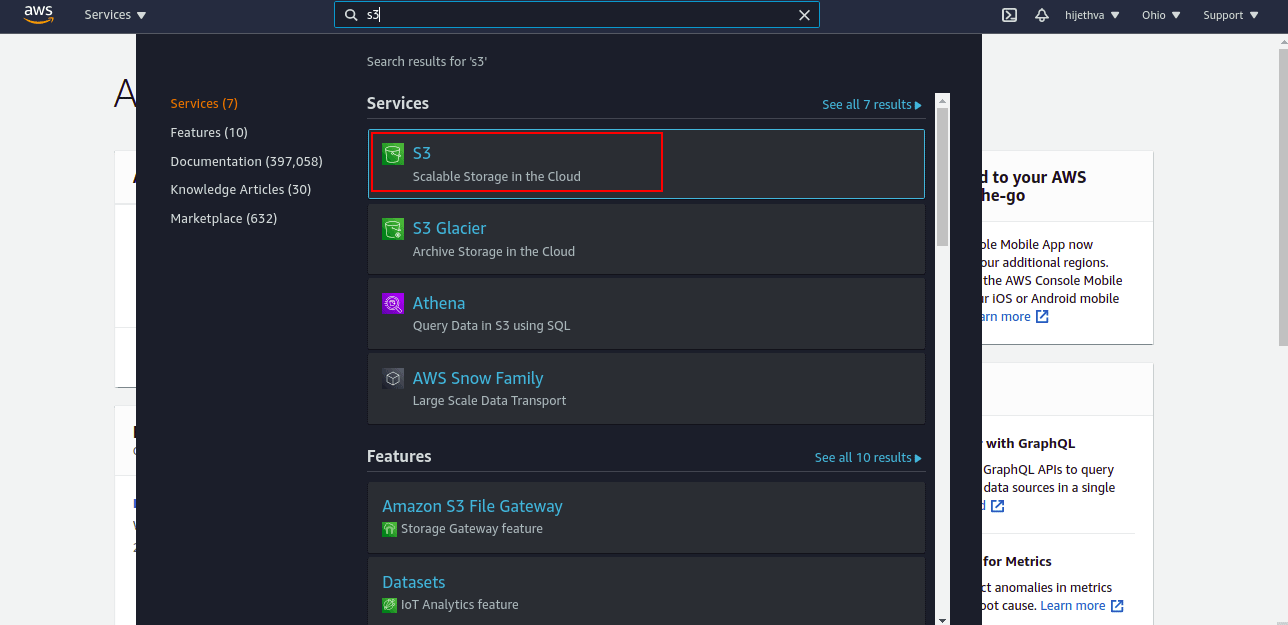
3. Click on S3. You should see the Amazon S3 dashboard on the next screen:
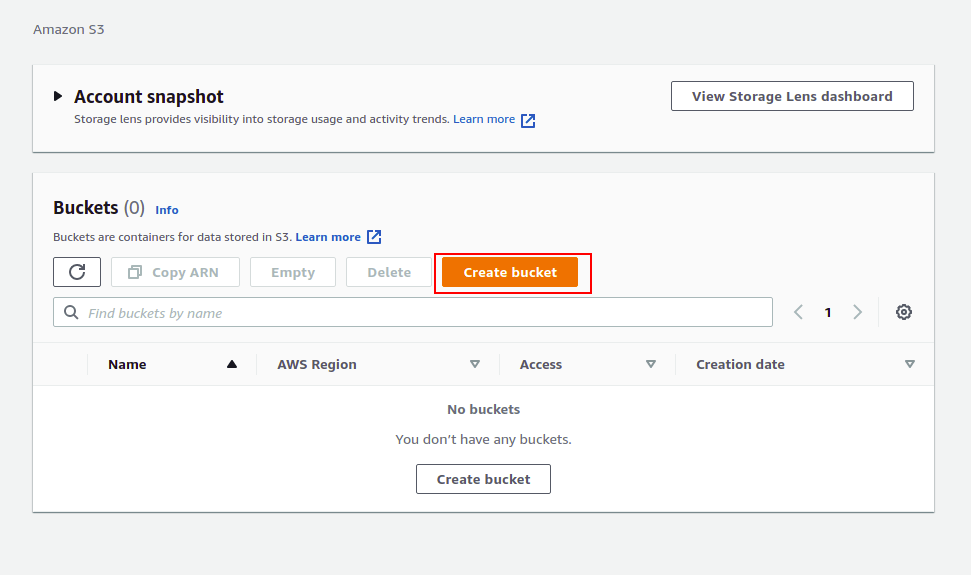
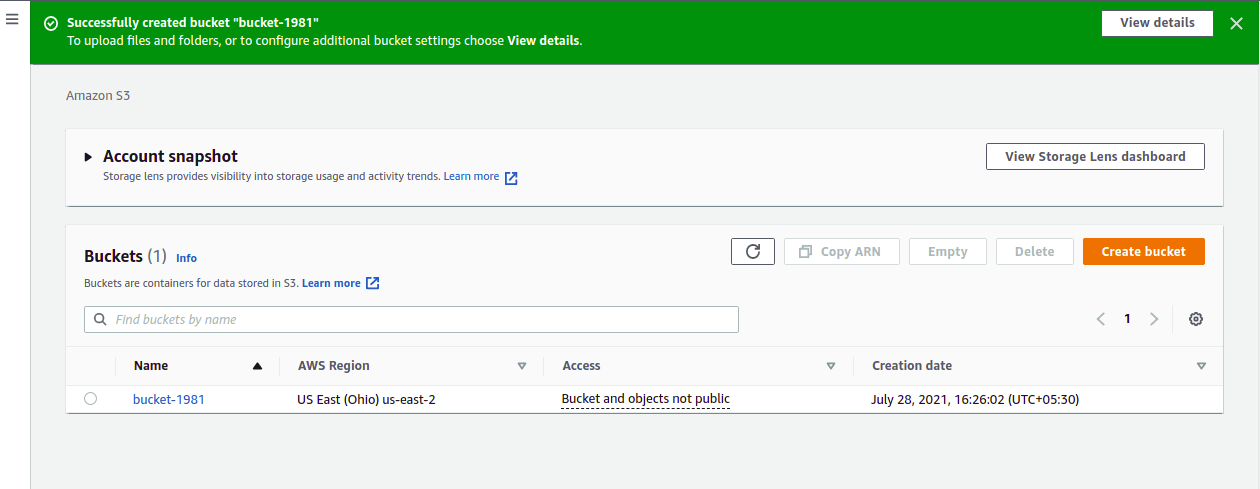
4. Click on the Create bucket push. Y'all should encounter the next screen:
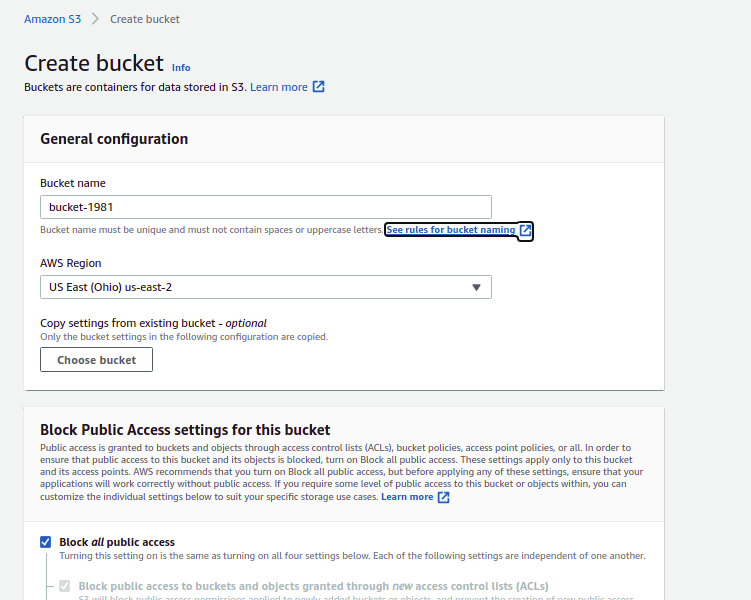
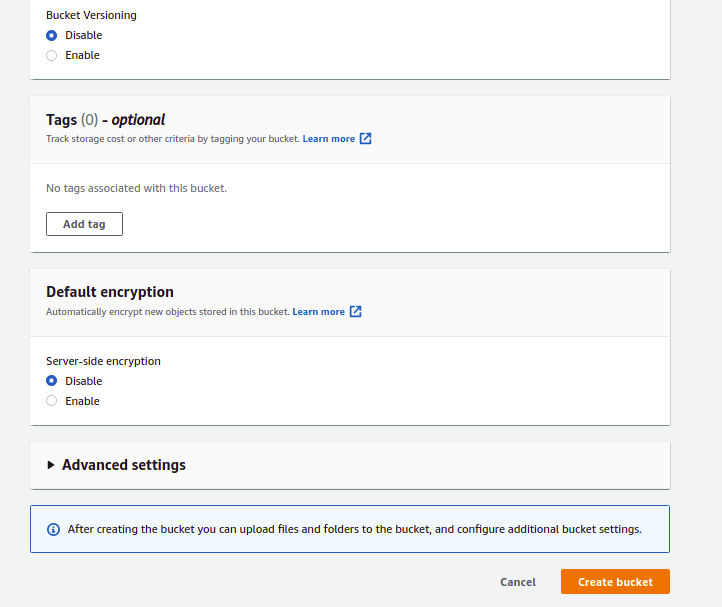
5. Provide your bucket proper noun, select your AWS region, and click on the Create bucket button. Once the saucepan has been created successfully, you lot should run across the side by side screen:
Create an IAM Part for SFTP Users
Side by side, you lot will demand to create an IAM office for SFTP users with an updated trust relationship.
Follow the below steps to create an IAM part:
one. Search for IAM in the search bar. You should see the following screen:
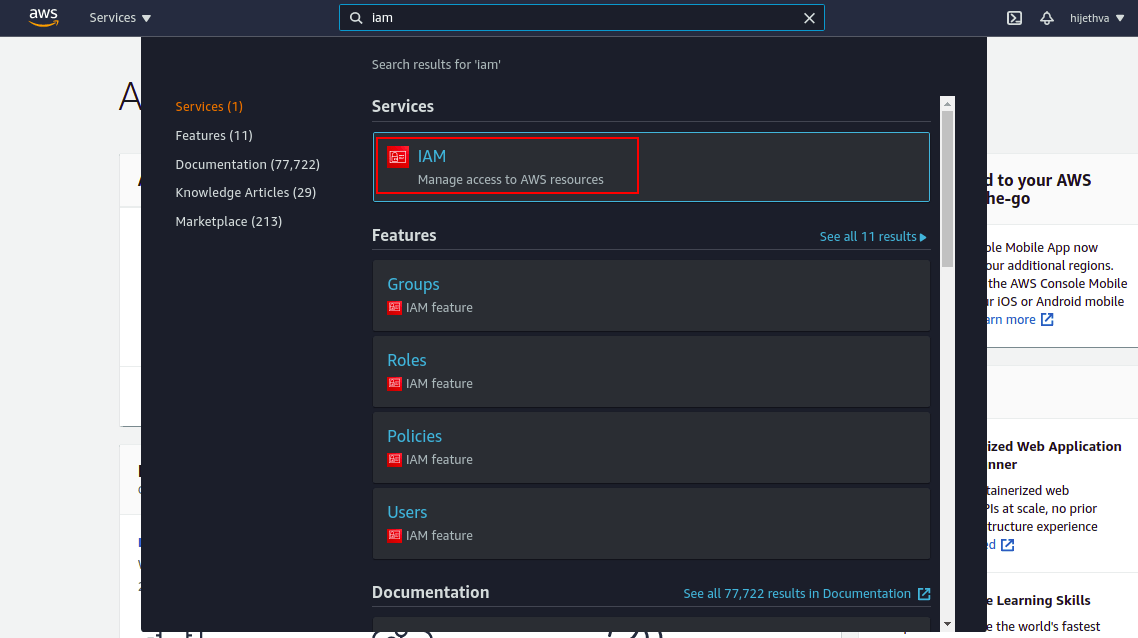
ii. Click on IAM. Yous should run across the following screen:

iii. Click on the Create office push. You lot should see the post-obit screen:
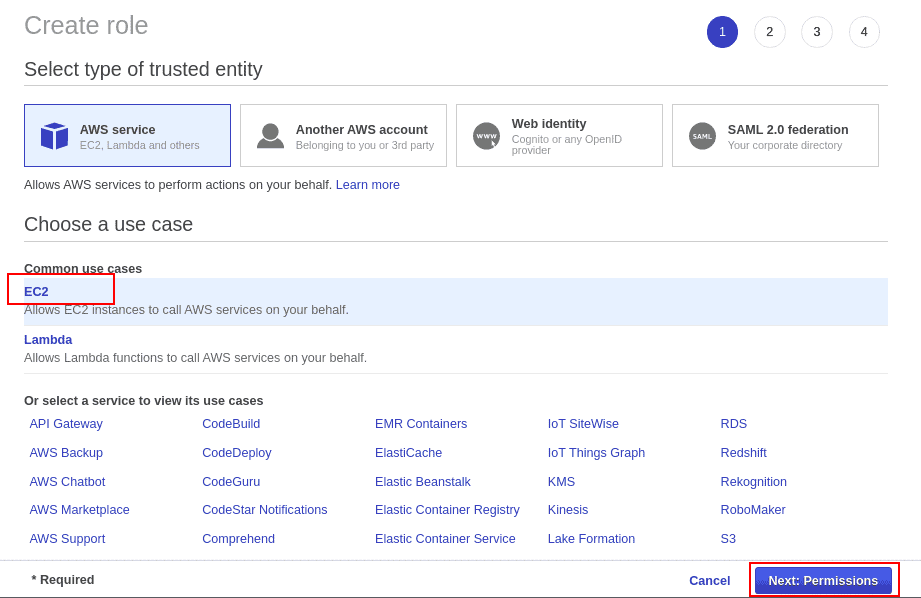
4. Select EC2 and click on the Next: Permissions. You should come across the post-obit screen:
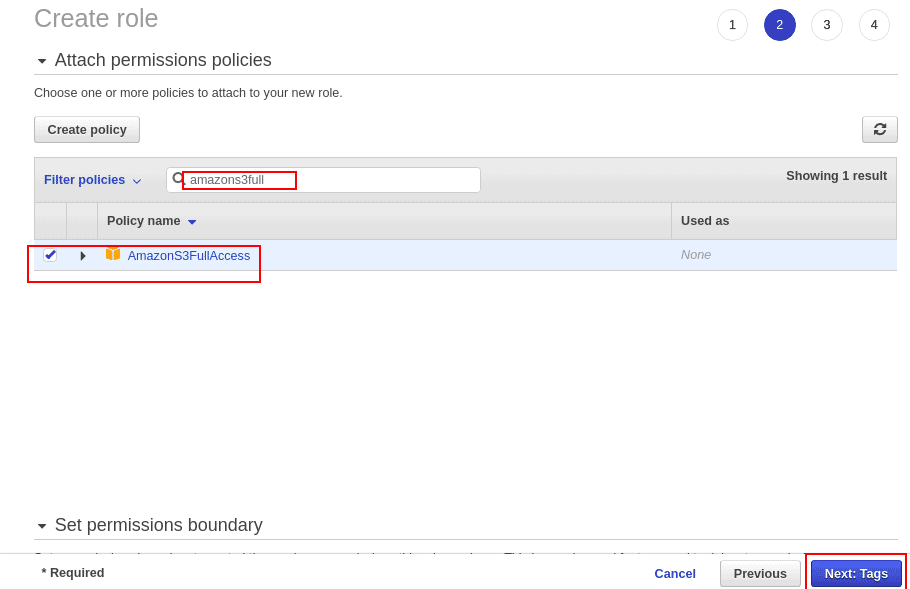
5. Search for AmazonS3FullAccess in the Filter policies search box, select AmazonS3FullAccess policy and click on the Adjacent: Tags push button. You should come across the following screen:
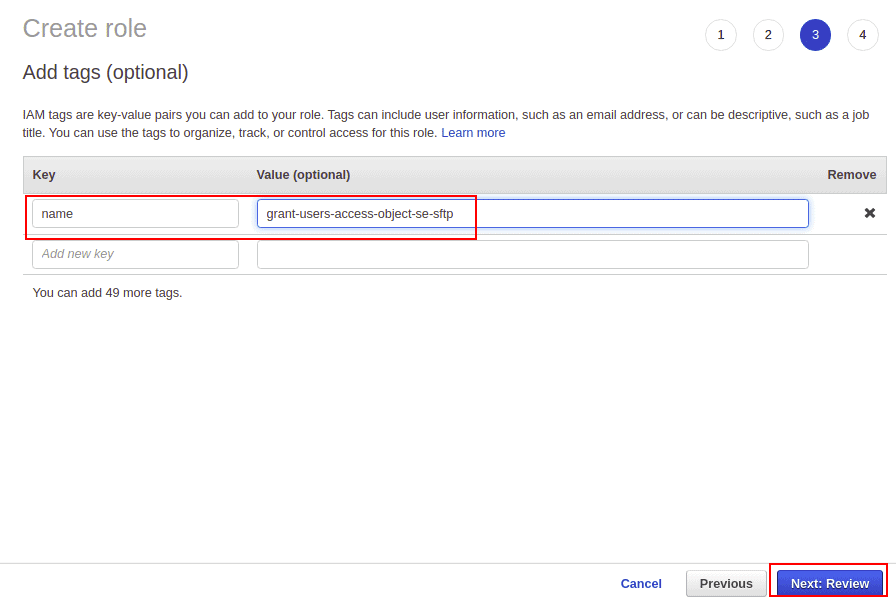
6. Provide the name and value of your Tag and click on the Next: Review button. You should see the following screen:
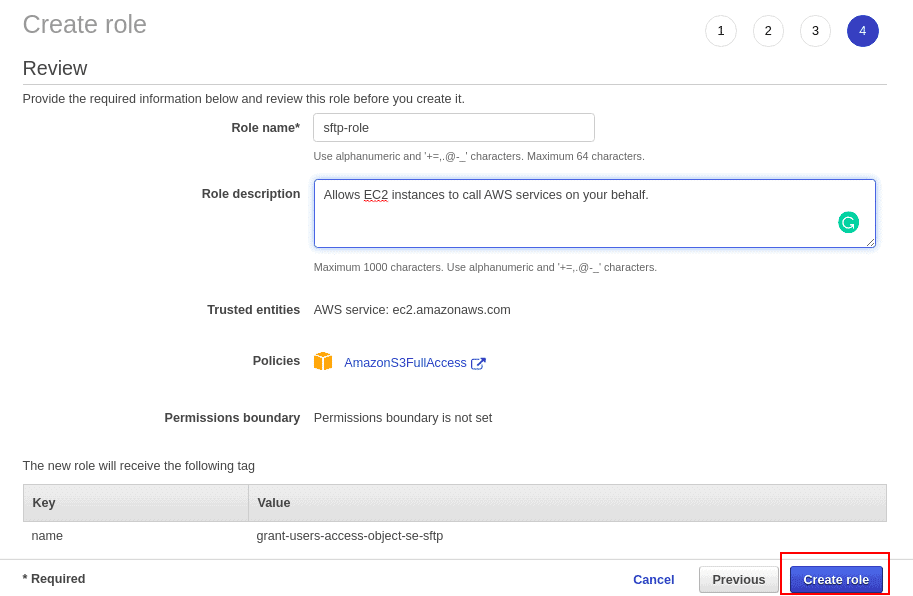
7. Provide your Role proper noun, description, and click on the Create role push. Once the Role has been created successfully, yous should see the post-obit screen:
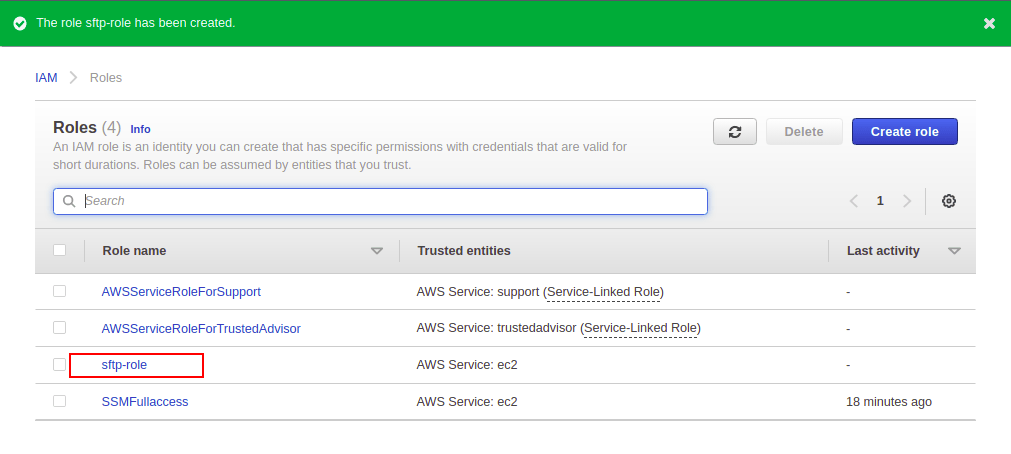
8. Next, click on your roles. You should see the following screen:
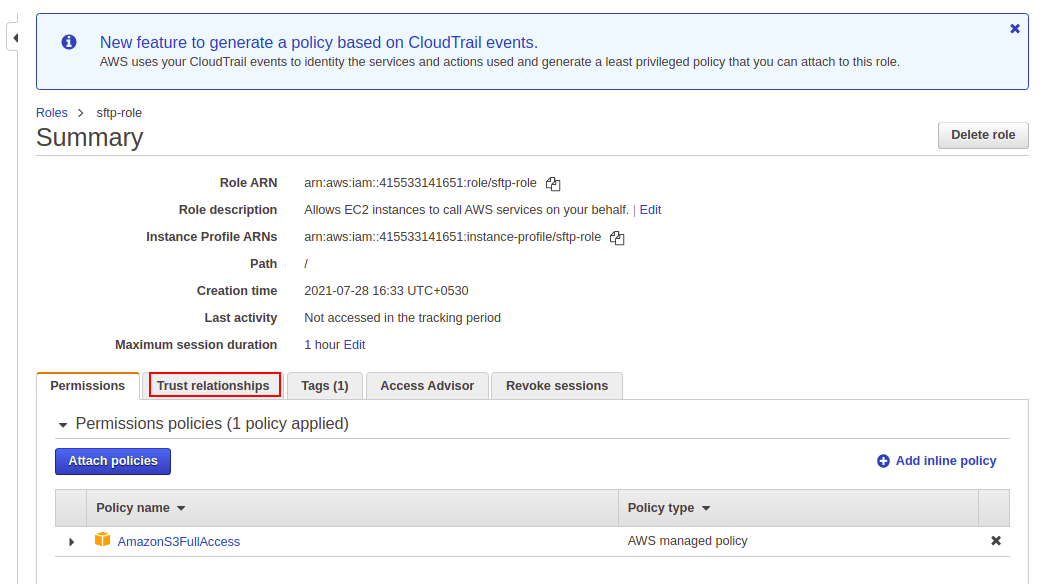
nine. Click on the Trust relationships tab. Yous should see the following screen:
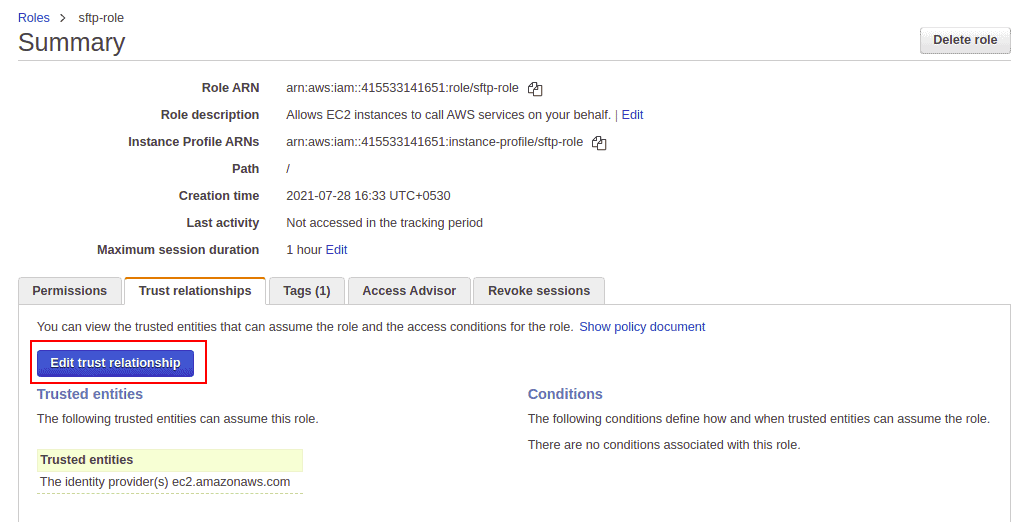
10. Click on Edit trust relationship. You lot should see the post-obit screen:

11. Replace the line ec2.amazonaws.com with transfer.amazonaws.com for sftp service to work. So, click on the Update Trust Policy button on the corner right side.
Create SFTP Server on Amazon AWS
Next, you volition need to create an SFTP server on AWS using the AWS Transfer Family service.
Follow the below steps to create an SFTP server.
1. Search for SFTP on the search bar. Yous should see the following screen:

2. Click on AWS Transfer Family. You should see the AWS Transfer Family dashboard:

3. Click on the Create server button. You will be asked to choose the protocols as shown below:
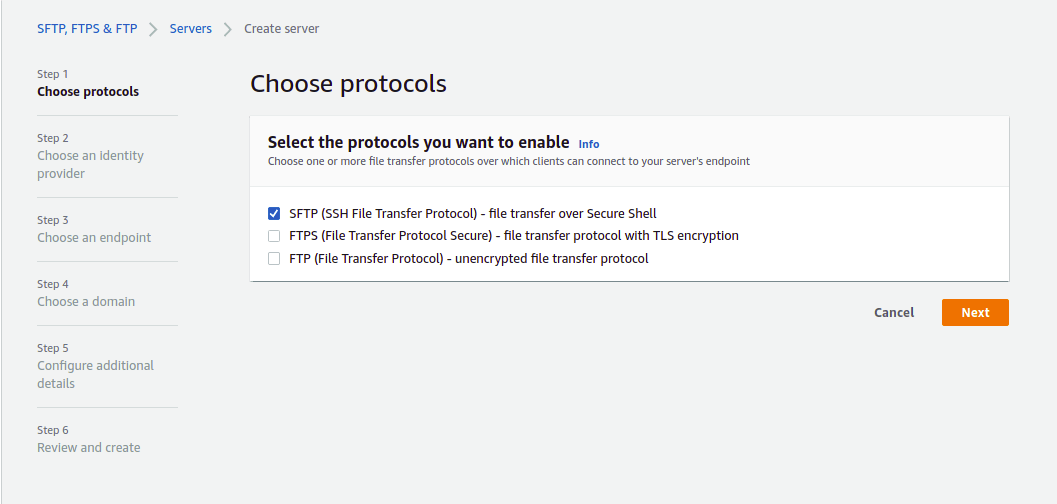
4. Select SFTP protocol and click on the Next button. Y'all volition be asked to select an identity provider equally shown beneath:
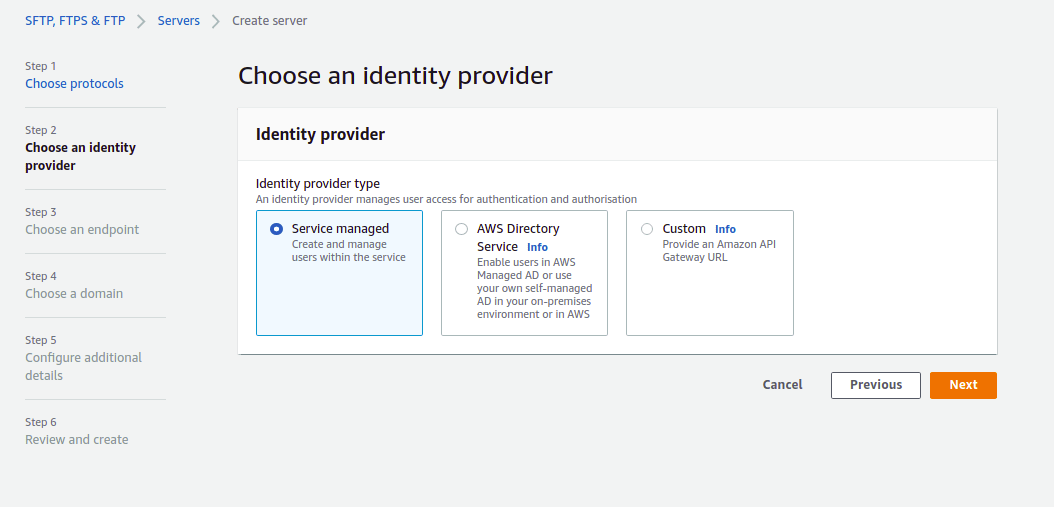
five. Select Service Manage and click on the Adjacent push button. Y'all will be asked to select an endpoint as shown below:
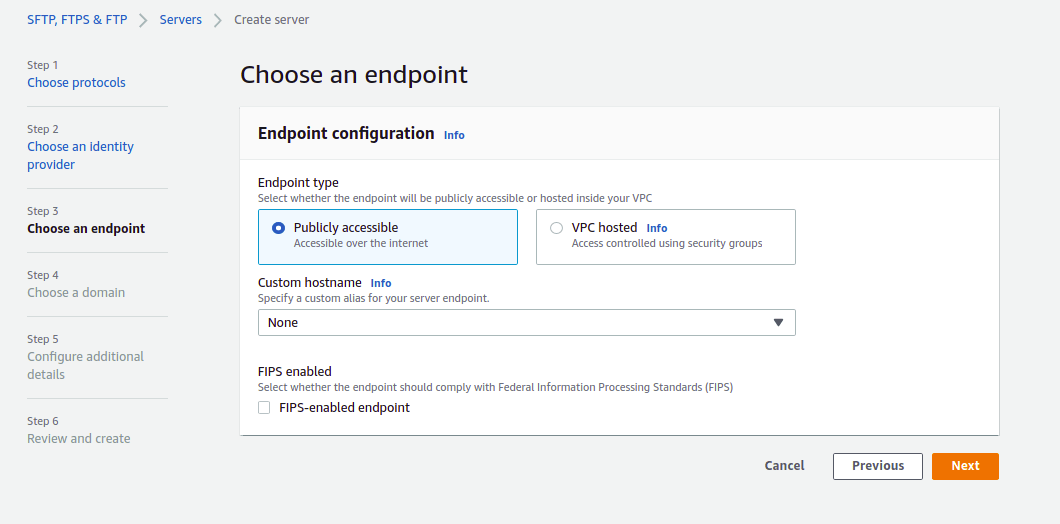
6. Select endpoint blazon, hostname, and click on the Side by side button. You will be asked to choose a domain every bit shown beneath:
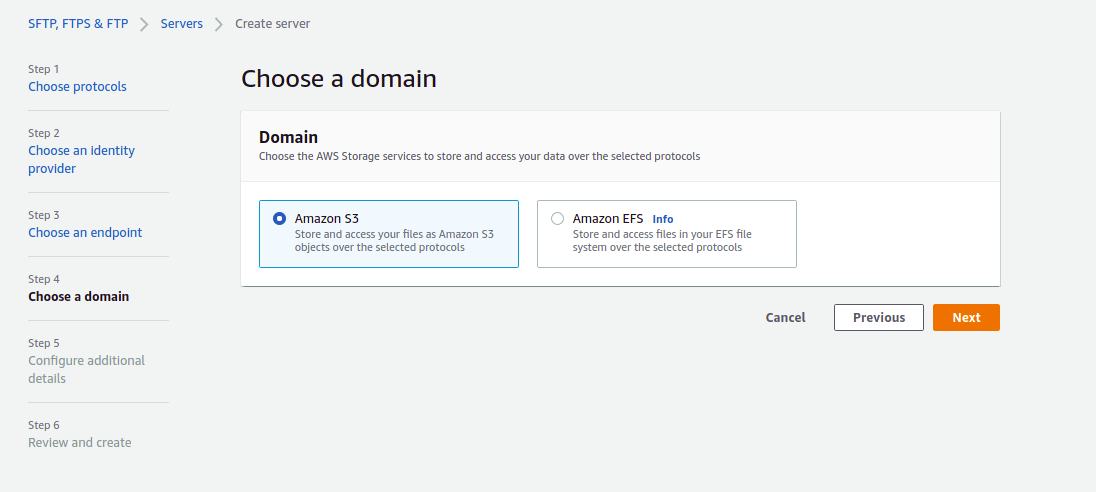
7. Select Amazon S3 and click on the Next button. You will be asked to configure additional details as shown beneath:
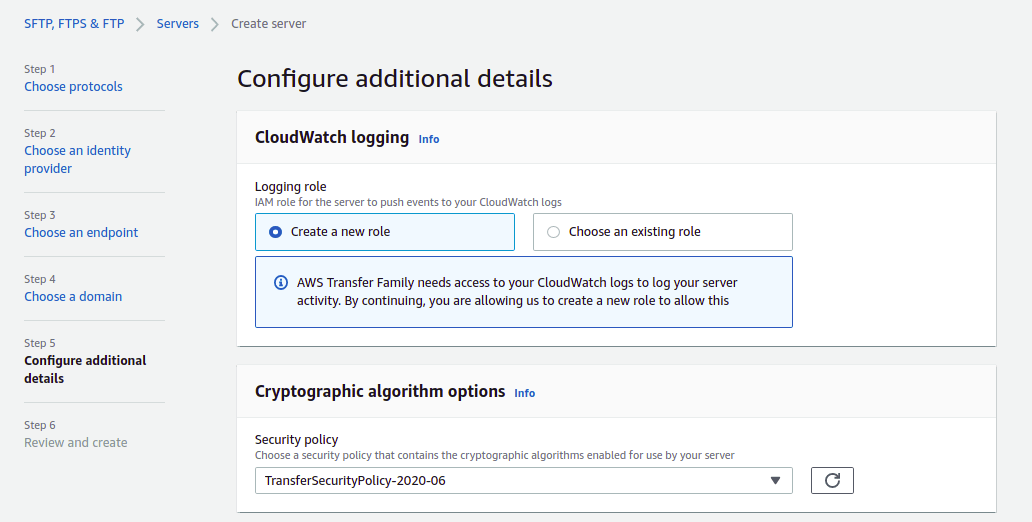
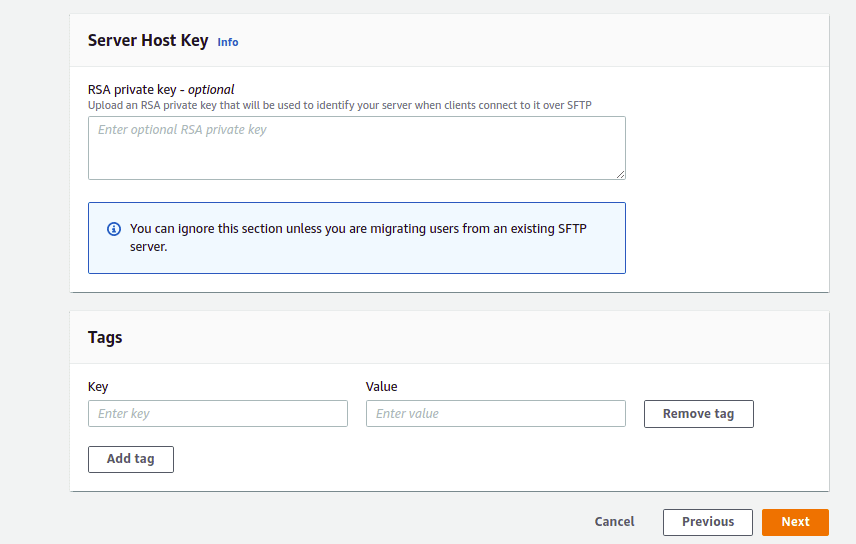
eight. Provide relevant details and click on the Next push. Yous should see the following screen:
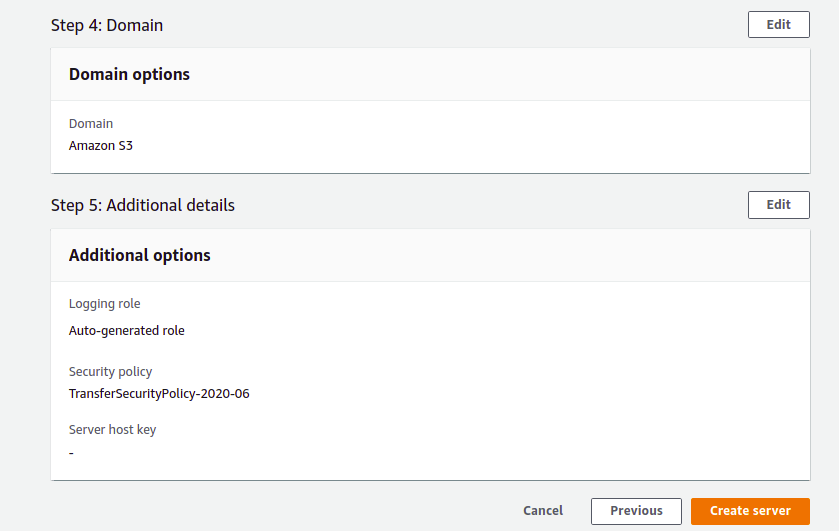
9. Review all the settings and click on the Create server button. Once the SFTP server has been created successfully, you should see the post-obit screen:
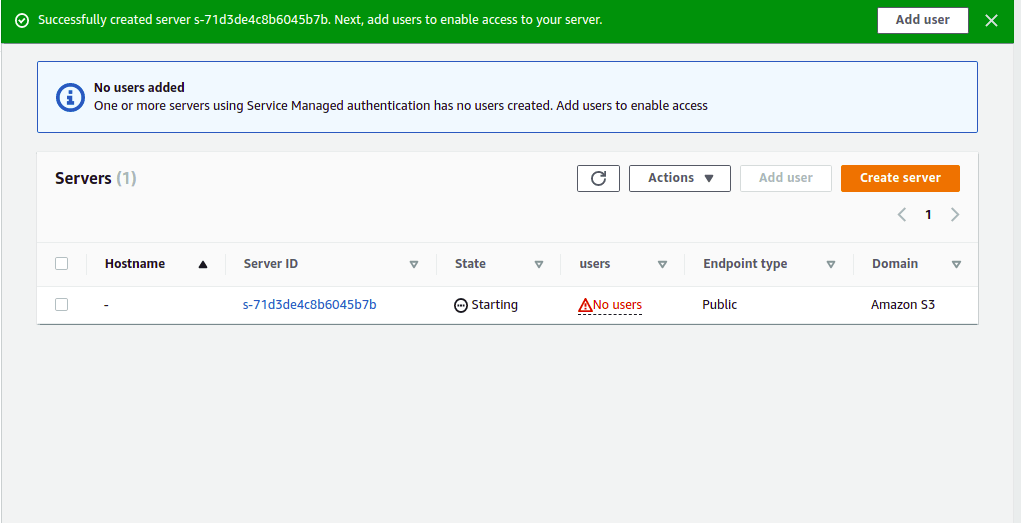
10. As you can observe, in that location are no users created nonetheless, so click on the button Add User for creating users who volition exist accessing this sftp service. Next, click on your SFTP server. You should see the following screen:
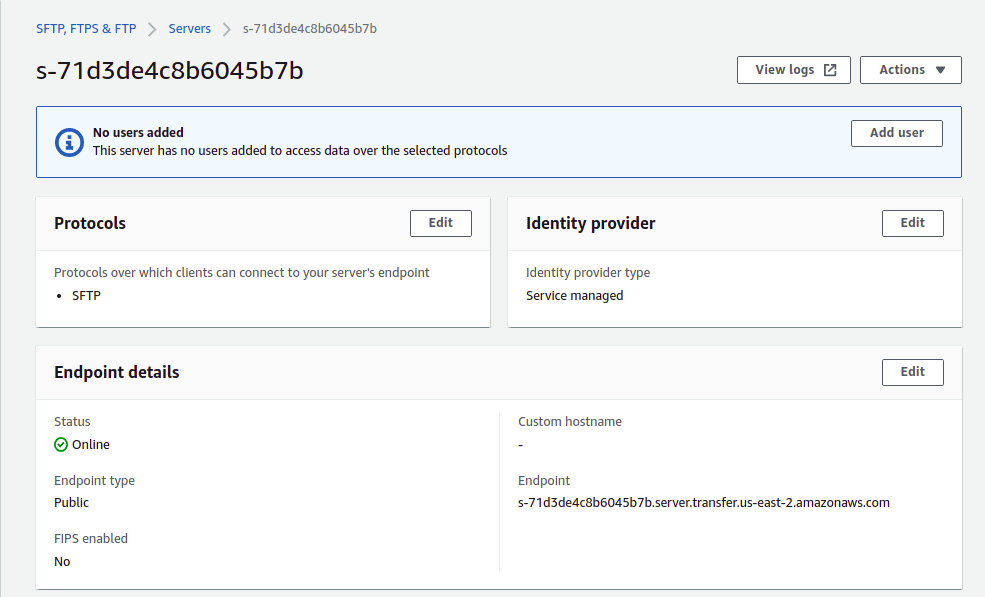
11. At present, click on the Add user button. You lot should see the user configuration page:
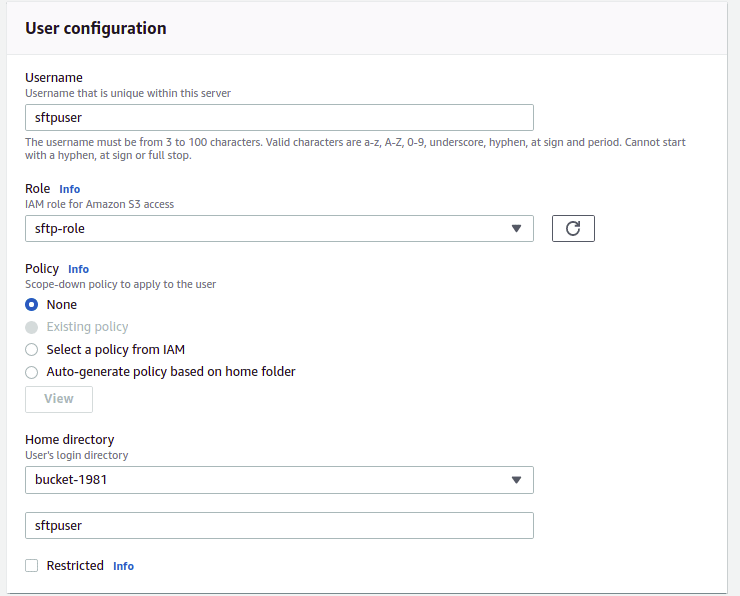

12. Here, provide your desired SFTP username, select the SFTP role we have created earlier, and select the S3 saucepan we created earlier. Yous volition too need to provide an SSH public key of the remote machine from where you desire to access the SFTP server.
To generate an SSH primal on the remote auto, run the following command:
ssh-keygen -P "" -f "sftp-primal"
Y'all should run across the following output:
Generating public/private rsa key pair.
Your identification has been saved in sftp-fundamental.
Your public key has been saved in sftp-key.pub.
The cardinal fingerprint is:
c6:e0:7b:73:5c:1d:4e:e7:3b:ab:6d:69:f1:c9:91:91 vyom@newpc
The key's randomart paradigm is:
+--[ RSA 2048]----+
| |
| |
| . o o|
| . o + E |
| . S . o +|
| o . . +.|
| . o o .o*|
| . o .*+|
| .+o |
+-----------------+
You can encounter the generated keys using the post-obit command:
ls -l sftp*
You should see the following output:
-rw------- i vyom vyom 1675 Jul 28 16:53 sftp-central
-rw-r--r-- i vyom vyom 392 Jul 28 16:53 sftp-primal.pub
Now, print the content of the sftp-central.pub public central:
cat sftp-key.pub
You should encounter the post-obit output:
ssh-rsa AAAAB3NzaC1yc2EAAAADAQABAAABAQDXeyyWpl5yXA1Zadz3x1Kb6J9XCQXr5d0nLUmOpOhhzdAjlbC3ykx93qu9i0cz3PV07XgcNaJpHm65VdB3nCxrMxYS91qeHm32Cnt3GI4o8TGHyjFBycOh8lo8lVF2OYPelOufEOXW1nZTDpGEW5MOOLM078LcoECskLWTOXyjopGhKqiHu/04cIvjo5YDHUbjoRhEryzDaSWnHe3KCz9q4TtQAAOU3Jc5iZeZH6o7CE3uUlGAppBd6gdvmBnccFBQC36+zmskbYciLDH398XYpg3r9fL4fdJlgjjhCg62m+rMCNtJDApLJdbIN477JloVr4iZcc3ysM16Dl3qTZIJ
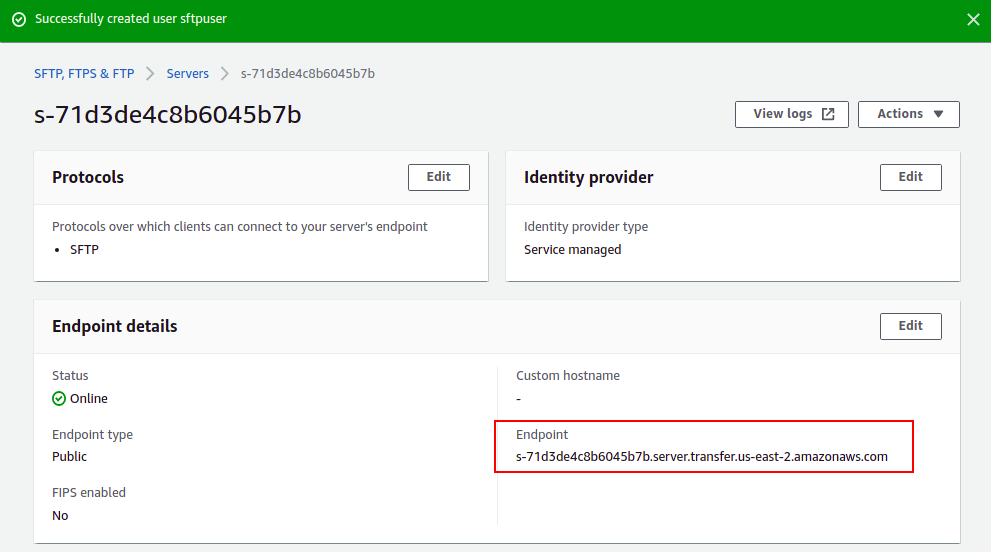
Now, copy the above central and paste it into the SFTP server dashboard. Then, click on the Add button. In one case the user has been added successfully, you should see the following screen:
Access SFTP server from Linux
At this point, the SFTP server has been installed and configured on Amazon AWS. Now, we will admission the SFTP server from the remote Linux machine.
Log in to the remote Linux machine, open the command-line final and admission the SFTP server using the following control:
sftp -i sftp-central sftpuser@due south-71d3de4c8b6045b7b.server.transfer.us-due east-ii.amazonaws.com
Where:
- sftp: It is a command used to connect remote SFTP server.
- -i sftp-fundamental: A private key is used to connect to an SFTP server without a password.
- sftpuser: It is the proper name of the SFTP username.
- southward-71d3de4c8b6045b7b.server.transfer.us-due east-ii.amazonaws.com: It is the total URL of your SFTP server.
Once you are continued to the SFTP server, yous should meet the following output:
The authenticity of host 's-71d3de4c8b6045b7b.server.transfer.united states-e-ii.amazonaws.com (3.129.55.151)' tin can't be established.
RSA fundamental fingerprint is ae:2e:cc:31:92:c9:a1:iron:d8:83:c0:08:2e:6b:49:fe.
Are you sure y'all want to continue connecting (yes/no)? yes
Warning: Permanently added 's-71d3de4c8b6045b7b.server.transfer.us-eastward-2.amazonaws.com,three.129.55.151' (RSA) to the listing of known hosts.
Connected to s-71d3de4c8b6045b7b.server.transfer.usa-east-ii.amazonaws.com.
sftp>
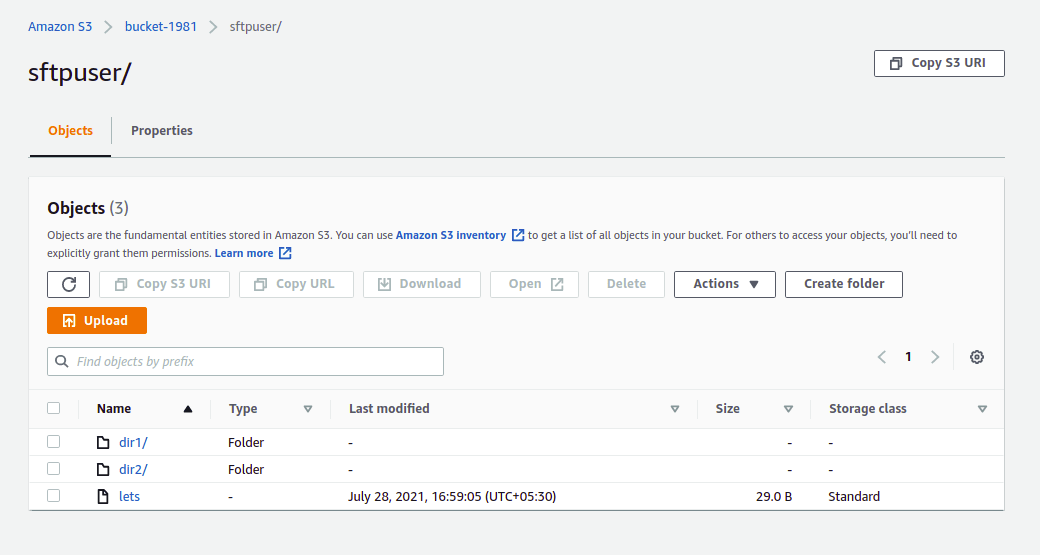
Now, create some directories on the SFTP server using the following commands:
sftp> mkdir dir1
sftp> mkdir dir2
At present, upload a file named lets from the local system to the SFTP server:
sftp> put lets
You should see the following output:
Uploading lets to /bucket-1981/sftpuser/lets
lets 100% 29 0.0KB/s 00:00
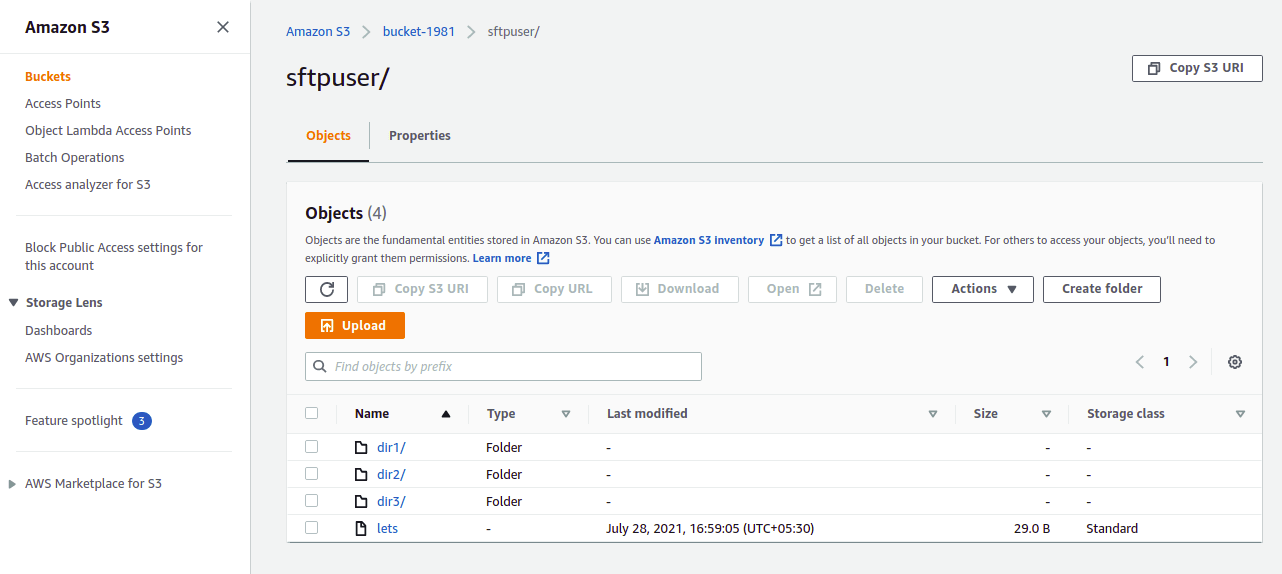
At present, login to the AWS console and go to the S3 bucket. You should run across the following screen:
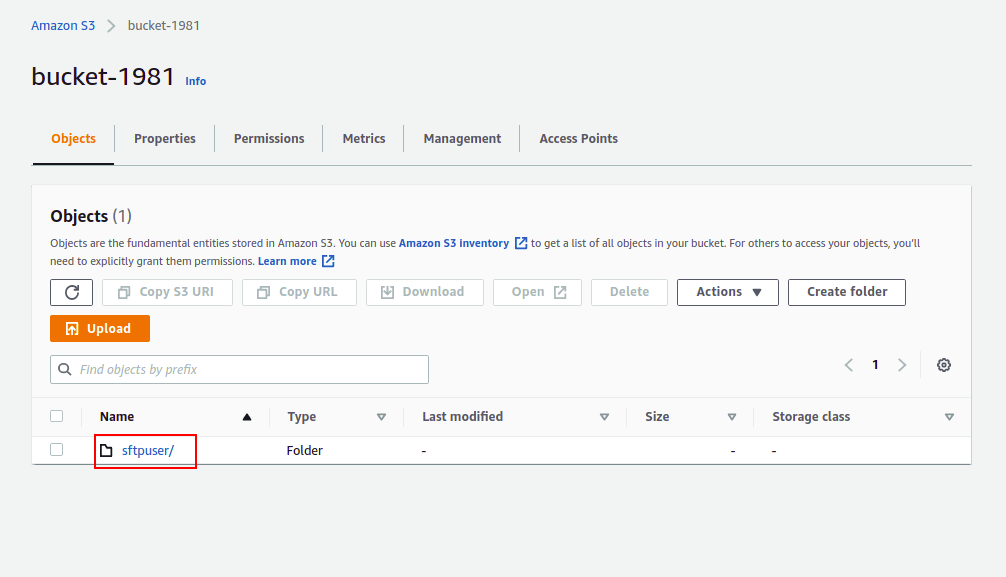
Click on the sftpuser home directory. You should see your file and guides on the post-obit screen:
Integrate Files.com with Amazon SFTP Server.
This section will show you how to connect the Amazon S3 bucket from Files.com and mount the S3 bucket to Files.com.
Follow the below steps to integrate Files.com with the Amazon SFTP server:
1. log in to Files.com and click on Integrations. Y'all should see the post-obit screen:
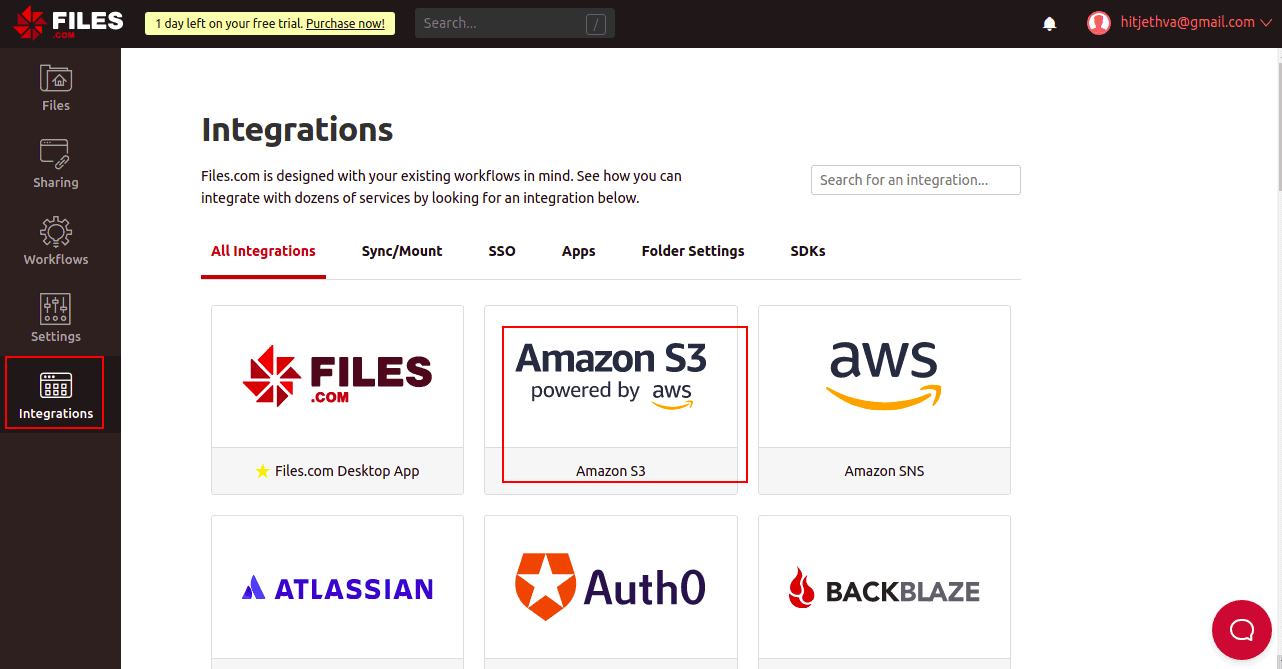
2. Click on the Amazon S3. You should run across the following screen:
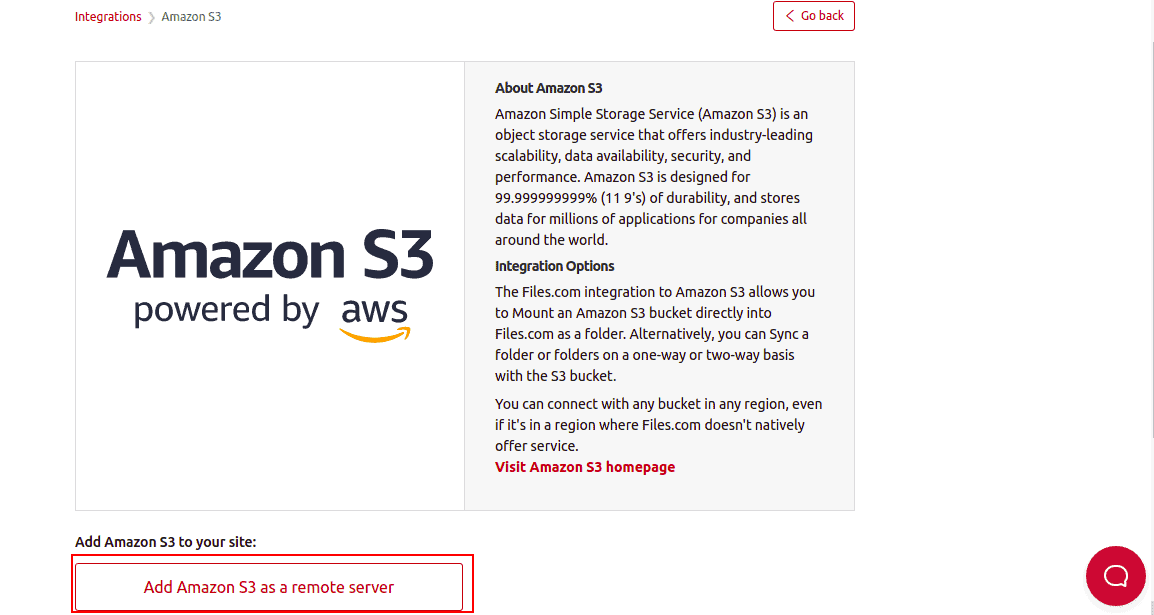
3. Click on Add together Amazon S3 as a remote server. You will be asked to provide your Amazon S3 credentials every bit shown beneath:
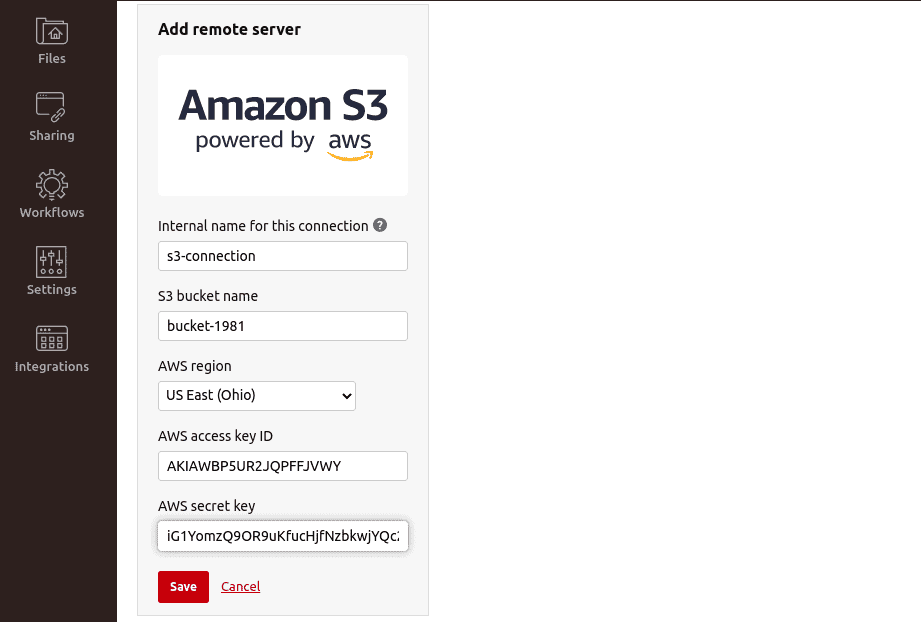
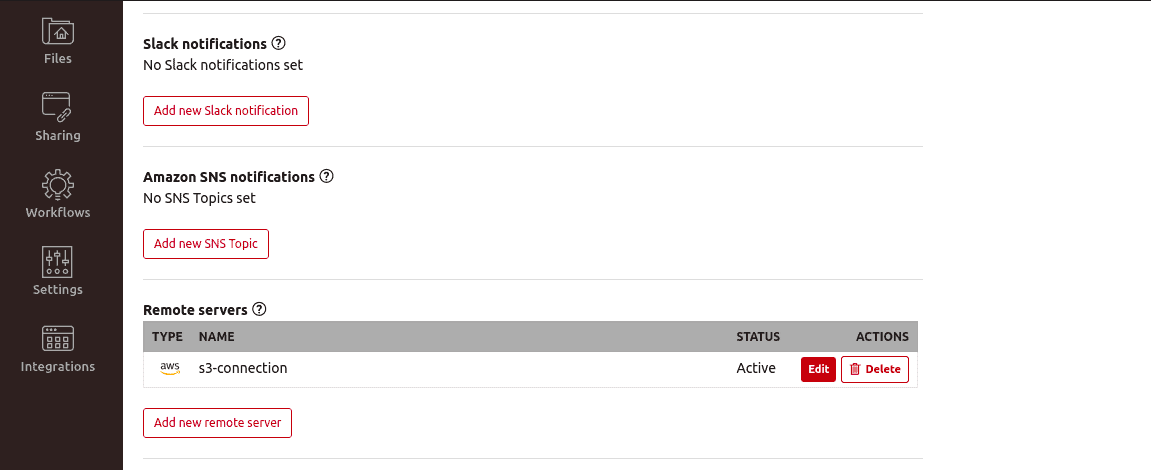
4. Provide a connection name, S3 bucket name, AWS region, AWS access fundamental, AWS clandestine key and click on the Save push button. In one case yous are connected to AWS S3 successfully, y'all should see the following screen:
5. Next, click on the Files on the Files.com dashboard. Yous should see the following screen:

6. Click on the New folder to create a new directory on Files.com. You lot will be asked to provide the proper noun of the folder as shown below:

7. Provide a folder name and click on the Create button.
8. Next, navigate to your newly created folder and click on the Folder settings. You should encounter the post-obit screen:
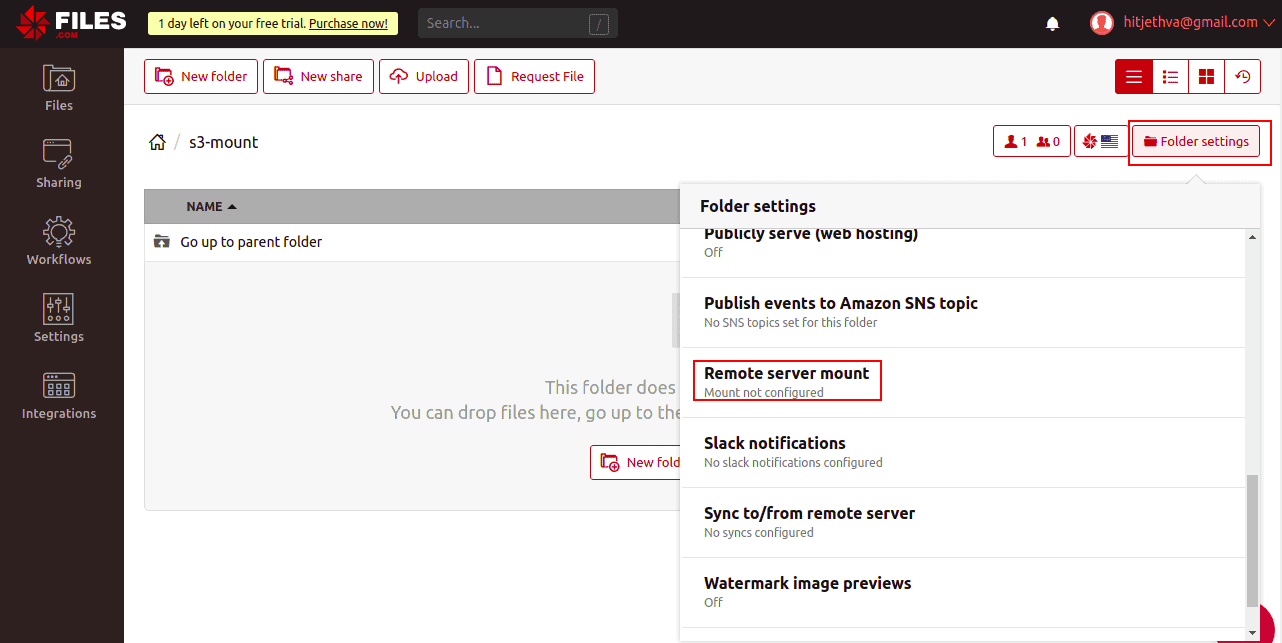
ix. Next, click on the Remote server mountain. You should run into the post-obit screen:
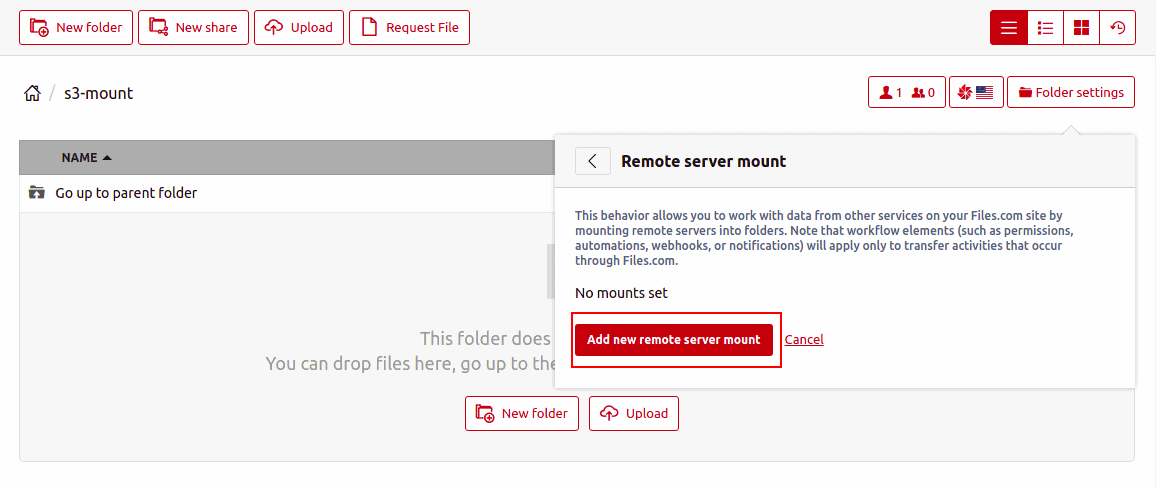
10. Click on Add new remote server mount. Y'all should run into the following screen:
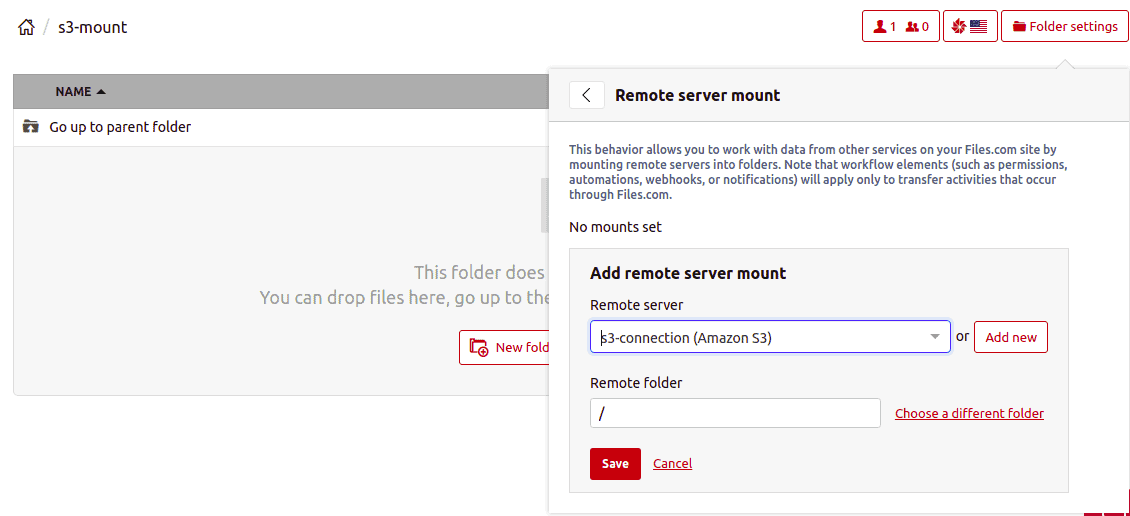
xi. Select your AWS S3 server, remote folder path, and click on the Save push. One time you lot are connected, you lot should see the following screen:
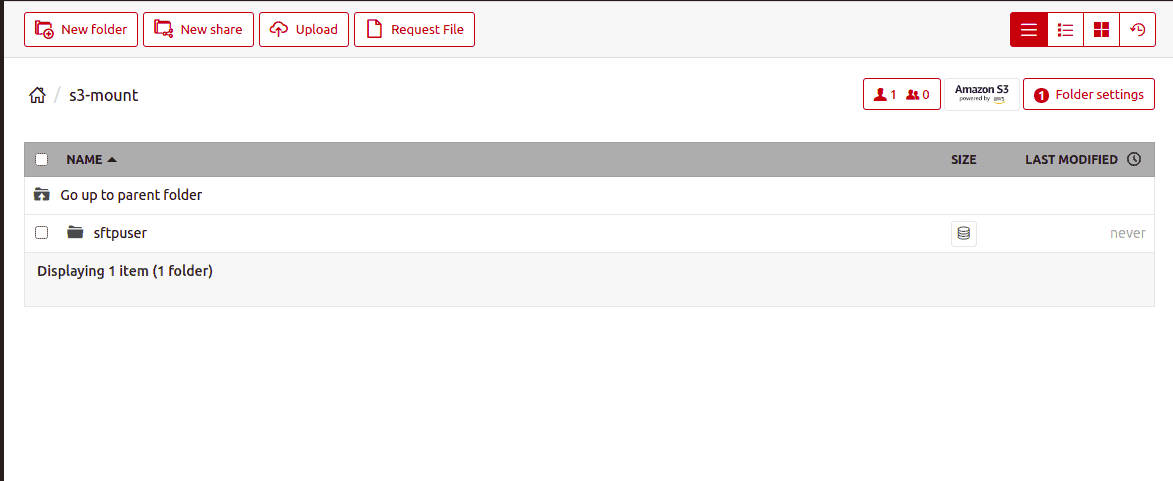
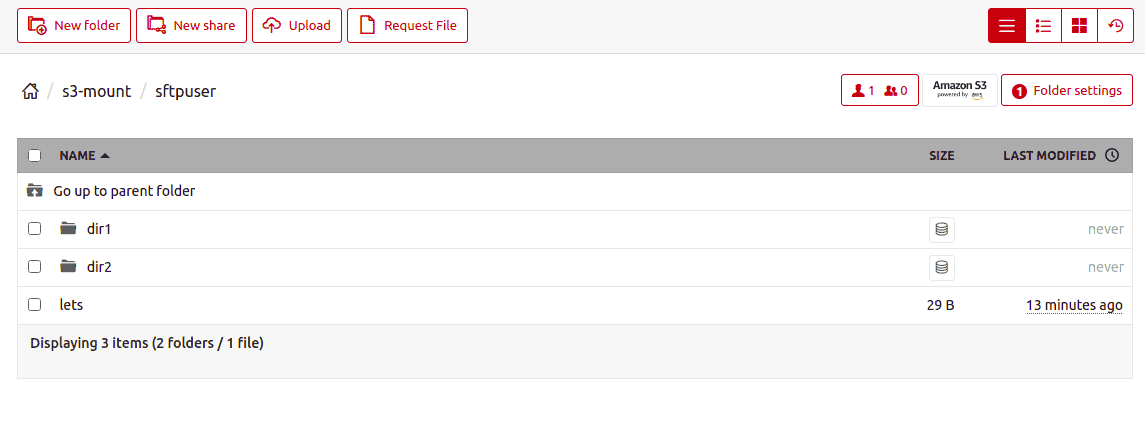
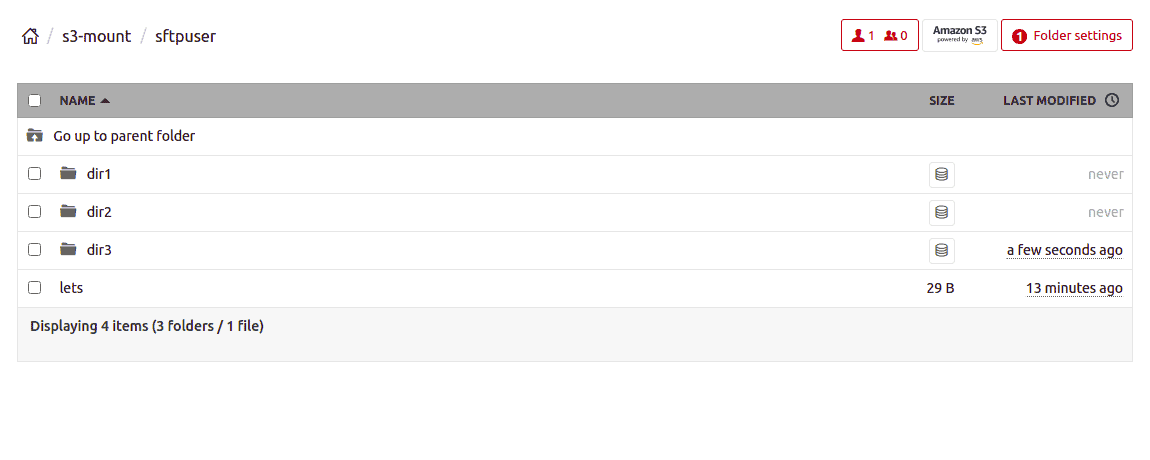
12. Now, click on sftpuser. Yous should run into that all directories and files are mounted on Files.com:
13. At present, click on the New binder to create a new binder on the mount point. You should see the following screen:
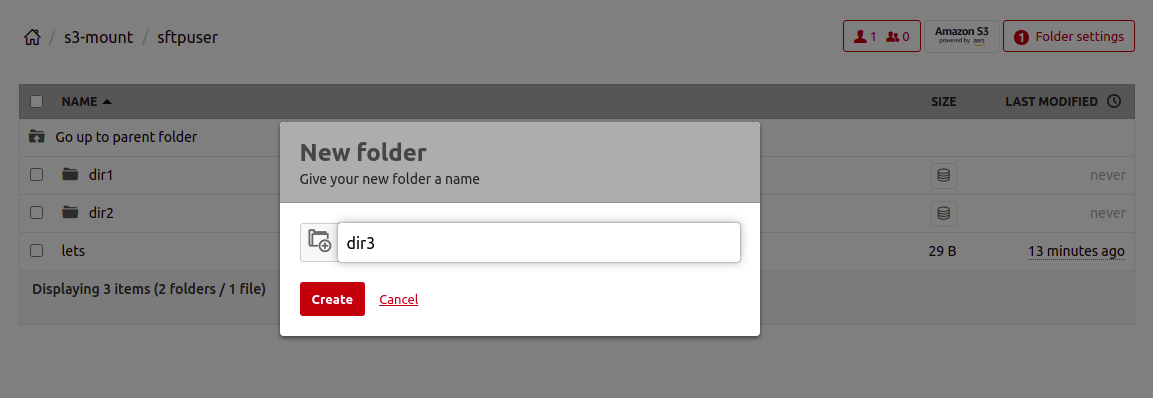
14. Provide your folder name and click on the Create push button. Yous should come across the following screen:
15. At present, go dorsum to your AWS S3 bucket. You should also see your newly created folder in that location.
Conclusion
In the in a higher place guide, you learned how to create an SFTP server on Amazon S3 and integrate it with Files.com. I would recommend Files.com for secure storage and transfer of your files, particularly huge ones. Files.com offers a seven-day free trial of their services.
thorntongracts1957.blogspot.com
Source: https://www.ittsystems.com/ftp-sftp-access-to-amazon-s3-bucket/
0 Response to "Centos Upload Files to Aws S3 Bucket"
Post a Comment